OnePacs Gateway Installation Guide (version 3.0+)
The following is a quick step-by-step guide to configuring a new installation of the OnePacs Gateway to transmit studies to OnePacs. The guide shows all the steps involved in configuring OnePacs to receive studies from one or more imaging facilities. Please refer to the more comprehensive Administrator’s Guide for further details.

Brief System Overview
In brief, DICOM studies are first transmitted from your PACS system(s) and/or modalities to a “Gateway” PC, which you supply and place on your local hospital network. When received at the Gateway PC, the studies are compressed, encrypted, and uploaded over the internet (via TLS/AES encrypted DICOM and HTTPS) to the OnePacs central server. On the central server, these received studies will be organized into a worklist which will be accessible to authorized users from any location on the internet. The Gateway PC will require a static local IP address on your local facility network such that studies can be pushed to it.
Please refer to the system diagram for an overview of the architecture of the OnePacs system.
The following is a summary of the technical requirements of the OnePacs Gateway. For more information please see OnePacs Gateway Technical Requirements.

Security
The OnePacs license agreement requires physical access restrictions limiting physical access to the gateway computer to authorized personnel with a legitimate need to access the equipment and/or the use of whole hard disk encryption (e.g. BitLocker).
The OnePacs Gateway should not be configured to support storage of DICOM images from multiple unrelated organizations.
For additional security considerations please see OnePacs Gateway Technical Requirements.
Installation steps
Pre-Install Checklist
- You should already have a designated AE title for facility that the Gateway will be installed at. If not, please create a new facility or contact your group administrator to do so. Do not proceed with the Gateway installation unless you have an AE title for the facility.
- Ensure that the technical requirements and networking requirements described above are met. In particular, the PC must have a static local IP address on the local network.
- Verify that the Windows user account you're using is an administrator account on the local machine (not a domain user). The installation of the PostgreSQL service may fail otherwise.
- Create a system restore point before install if there is any doubt regarding conflicts caused by the prerequisite installations (Microsoft Visual C++ 2015-2019 x86 14.22.27821, PostgreSQL 12)
- If anti-virus is installed, it is a good idea to temporarily disable it before the install.
(1) Download the OnePacs Gateway
Log into OnePacs. Select the "Options" menu and choose the "Downloads" option. If your user account is authorized to download the OnePacs Gateway you will see it as an option on the downloads page.

Download the Windows executable for the OnePacs Gateway and save the file.
(2) Run the Installer
Remember to execute the installer only while logged in as a local Administrator. Run the installer by double clicking the file.
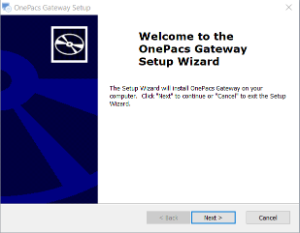
Click "Next" to proceed to the license agreement.
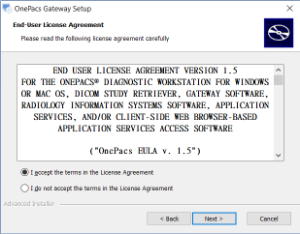
Read and agree to the license agreement. Then click "Next". This will bring you to the Gateway Details page.
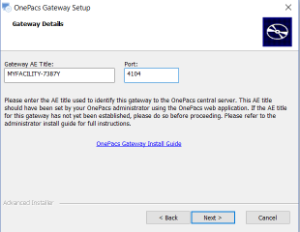
Enter the AE title specific to your facility exactly as it was provided to you. You may change the DICOM port if necessary. OnePacs recommends using the default port of 4104 unless there is a specific reason to change it.
 IMPORTANT The AE title must exactly match the configured AE title in OnePacs. This value is case sensitive.
Click "Next" to proceed to the "Lossy Compression" page.
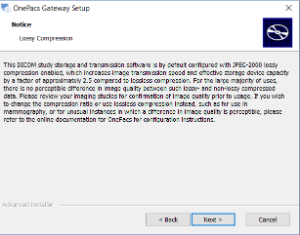
Read the lossy compression disclaimer. Please note that you may change the compression rules after the installation completes. Click "Next" to continue.
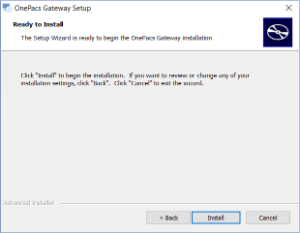
When ready, click on "Install" to begin the installation.
The installation will begin by installation prerequisite applications like Microsoft Visual C++ and the PostgreSQL database server. Once that completes, the installation of the OnePacs gateway will begin. Once the install completes you will see a "Best Practices" guide. Read this guide and ensure that all recommendations are considered.
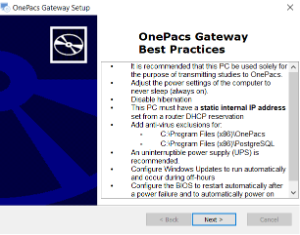
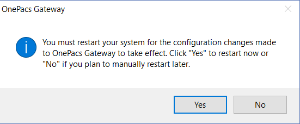
Finally, click "Next" and "Finish" to complete the installation. Click "Yes" to reboot the PC after closing any other open applications.
(3) Set up Antivirus Exclusions
To optimize Gateway performance, and prevent conflicts with antivirus processes, please exclude the following directories from anti-virus scanning.
The Gateway will generally function normally even if this is not done, however, there is a potential for occasional transmission delays or errors related to anti-virus scanning, and it is recommended that this step be done.
C:\Program Files\PostgreSQL
(4) Connectivity Testing
Verify connectivity with the cloud by performing the connectivity testing step detailed on the user interface page.
(5) Configure your PACS and/or modalities to transmit to the Gateway PC
Configure the Gateway PC as a DICOM destination in your PACS and/or on your modalities. You can use the AE title GATEWAY for transmission; it is also possible to enter in the AE title which was set for the Gateway PC in step (2). The host name or address for transmission will be the static IP address assigned to the gateway, and the port for transmission is 4104 unless changed during the installation. We recommend sending uncompressed (ILE or ELE) unless the images are already lossy compressed (multi-frame US for example).
(6) Send test cases to OnePacs
Push test cases from your PACS and/or modalities to the Gateway PC, and log in to OnePacs and monitor the worklist for cases. Soon after pushing cases to the Gateway PC, you should see the cases begin to populate the OnePacs worklist.
(7) You’re done!
Should you experience any problem with the above setup, please contact OnePacs customer support for further assistance.
Uninstalling and reinstalling the Gateway software
Uninstalling and reinstalling the Gateway software is not generally a useful troubleshooting step.
However, should you wish to do so, or if you are directed to do so by OnePacs technical support, the following steps are involved:
Changing the AE title of the Gateway
If the AE title of the Gateway was entered incorrectly, or if you wish for any other reason to change the AE title of the gateway, please follow the steps on this page.


