Facility Management
In OnePacs, a facility is a logical grouping of related imaging centers or hospitals. Typically, it is a single imaging facility or hospital. A facility allows configuration of many workflow related settings such as report templates, report distribution, and study retention. A facility also may restrict user access to studies.
Administrators of the OnePacs system have the ability to configure facilities within the system. The Gateway AE Title that is defined when creating the facility is the AE title that is used when the Gateway is installed on the local network of the facility. A facility configuration allows an administrator to configure workflow and default settings for studies that are sent in for a facility. Study access, confirmation settings, reporting requirements such as turn around time, directory information, reporting templates, security policies, report distributions, etc are usually related to or configured at the facility level.
To see a list of facilities. Click the Admin → Facilities menu option. A grid will show with the facilities that you have configured. You may filter this list by facility description, member of a facility group, or the facility state. Check the Show inactive/disabled checkbox to show facilities that are no longer active.
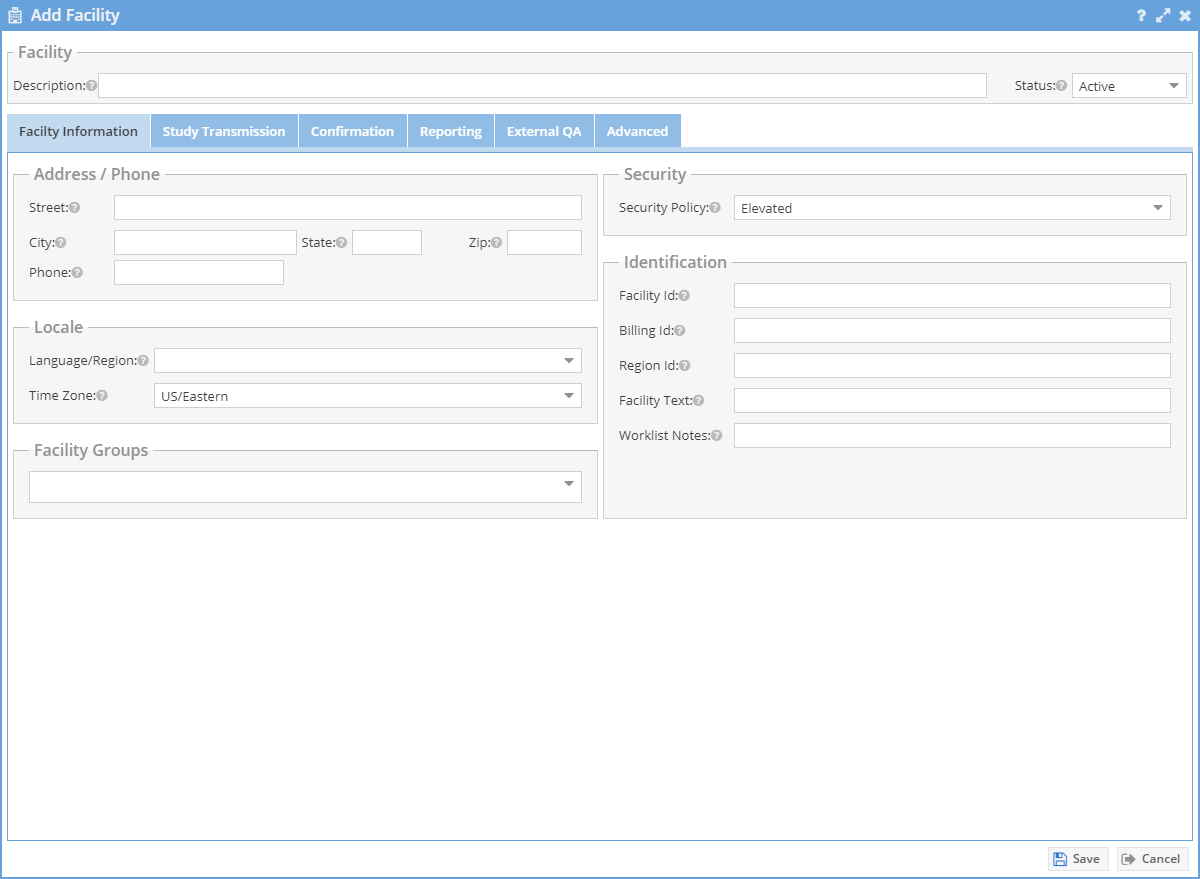
Use the add button to add a new facility.
Select a facility and click the edit button to edit an existing facilities settings.
Use the sample cases toolbar button to quickly store some sample cases to the facility for testing or demonstration purposes.
You can create a facility that is similar to an existing facility by selecting the existing facility on the facility list and then selecting the down arrow on the add button and then selecting the “create facility from prototype” option. This will fill the facility form with the options from the existing facility.
Use the Add -> Defaults button to configure the defaults for new facilities. When the add button is selected to create a new facility, the default options will be populated.
Highlighted fields
Description: The text that may show on the worklist identifying where the study originated.
AE Title: The facility defined AE Title. This is used during the gateway installation.
Time Zone: Identifies the timezone of the facility. Important so that the study date and time are correctly identified inside of a timezone.
Retention Time (days): How long the studies from this facility will remain on OnePacs. After this time period the studies may be eligible to be cleared from the system leaving only the report and the key images.
Confirmation (Workflow): Depending on use, this may add a workflow whereas the technologist must confirm the use of a study. Technologists may add patient history and state if a diagnostic report is necessary or if this study is for comparison.
Hover over a field for help on a setting. Adjust the confirmation and reporting sections as necessary for the facility.
Other Highlights
- A designated critical case category and other stat cases settings can be configured.
- Facilities can have different turn around time requirements based on regular, stat, or critical cases. Turn around times can be confirmed by when the images were received or when the technologist confirmed the case.
- Reporting preferences can be configured. (Read type, study type requirements, impression field, default reporting template by read type)
- Facility and radiologist contact information can be entered.
- Radiologist an radiologist assistant specific requirements/notes for case assignment and reporting.
- Configure history fields
- Configure if patient and study metadata updates are allowed
- Configure if applicable study files are automatically converted to DICOM and included in the study record.
- Configure the contact information for the facility including address and state information. This information can be used in the reporting template.
- Configure what fields are mandatory when a technologist confirms a case (History, ordering physician)
- Configure if a technologist must enter information about what prior studies and reports are being sent over in addition to the study that needs interpretation.
- Restrict facility users' study flag options, as shown in this screenshot:
- Set a default study type
- Configure if a technologist may enter study type information during confirmation.
- Configure if a technologist may enter laterality, reformations, IV contrast, or request a read type (Preliminary, Final) information during confirmation.
- Option to configure the threshold from study date to received time before a study is considered "old". Option to configure a threshold between study date and received time to automatically mark a case as a comparison study.
- A facility "transmission model" can be set. In general the Gateway defines the facility. However, the hub and endpoint transmission models can be used so that a OnePacs Gateway could send studies to different endpoint facilities bases on information in the study.
- Configure if results reporting issues a report addenda is available, mandatory, optionally on, or optionally off.
- Option to configure a default priority (STAT)
- Specify if the primary report or the same read type may be replaced. (Or if only an addenda is available.)
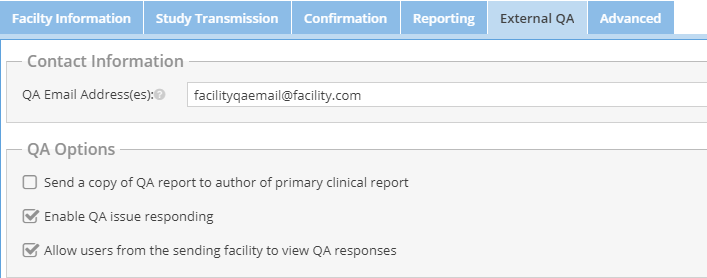
- Specify an external QA workflow using the "External QA" tab. Administrators can determine where the notification emails are sent, who can enter QA issues, and whether the facility may see the responses.
- Reporting Tags. Under the reporting tab one can configure tags to be used in selecting appropriate Report Generator templates. Example tags might include the name of this facility, to select facility-specific templates, or other content indicators such as "detailed", "research", "outpatient", and so on, that might aid in selecting templates most appropriate for this facility.
- Limited Administrators and Administrators may enter private administrative facility notes. These notes will also show for them on the facility directory.
- Don't allow facility users to disregard a previosly confirmed cased once it is locked for reading. (Confirmation Tab)
Click save to save the facility settings.


