The Basic Study Upload Interface
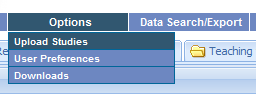
- First, locate the directory which contains the DICOM images you wish to upload to OnePacs. For CD-ROMs, this generally will be a folder in the root directory of the CD called “DICOM”. Create a ZIP file of this directory. (On Windows, you may copy the directory to your hard drive, then right-click on it, and select Send to… Compressed folder).Next, select either the “Upload studies…” item from the Options menu in OnePacs, or click on the “Upload” button on the tool bar at the bottom of a OnePacs worklist page:

- After selecting the upload option using one of these methods, a window will appear, allowing you to select ZIP files containing DICOM studies which you wish to upload to OnePacs. You may add several such files. Click on the “Add…” button, and add the ZIP file which contains the DICOM images desired.
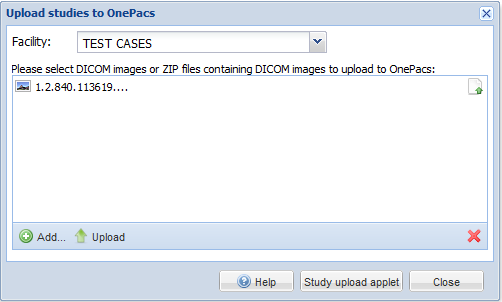
- If you have access to more than one OnePacs facility, you may also select the facility to which the study belongs from a pop-up menu at the top of the window.
- After the facility is selected, if applicable, and the studies to upload have been chosen, click the “upload” button.
- The study will then be uploaded to OnePacs and will be immediately available on the system.