It is possible to use the standalone Windows OnePacs Study Retriever to store images and launch studies on OnePacs Workstation for macOS, or an OsirixTM workstation running on another computer. This can be advantageous as it allows the user to dictate independently from image manipulation. The following steps describe how to configure both computers in such a fashion.
Requirements
- This solution works best when the IP address of the Mac computer is static (unchanging) on the local network. A DHCP reservation in your router is recommended.
- If there is a firewall enabled on the Mac you may need to update it to allow local network traffic to the DICOM and RPC ports (defaults of 11112 and 8080 respectively)
On the Mac:
- Install OnePacs Workstation for macOS, HorosTM, or OsiriX.TM
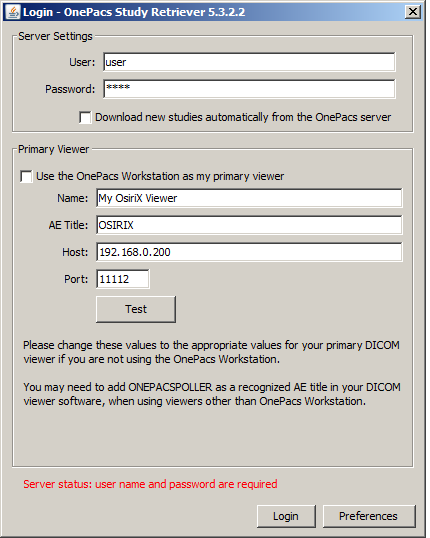
- Determine the AE title and Port of the Workstation in Preferences -> Listener. By default, the port is 11112.
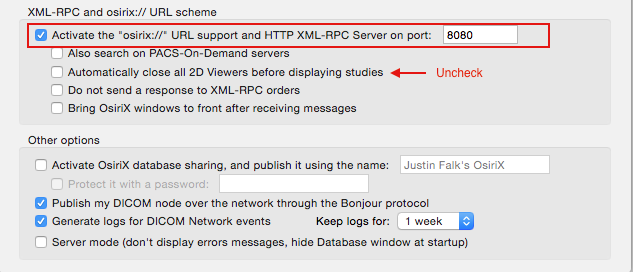
- Ensure that RPC is enabled and make note of the port (8080 by default). Preferences -> Listener -> XML-RPC
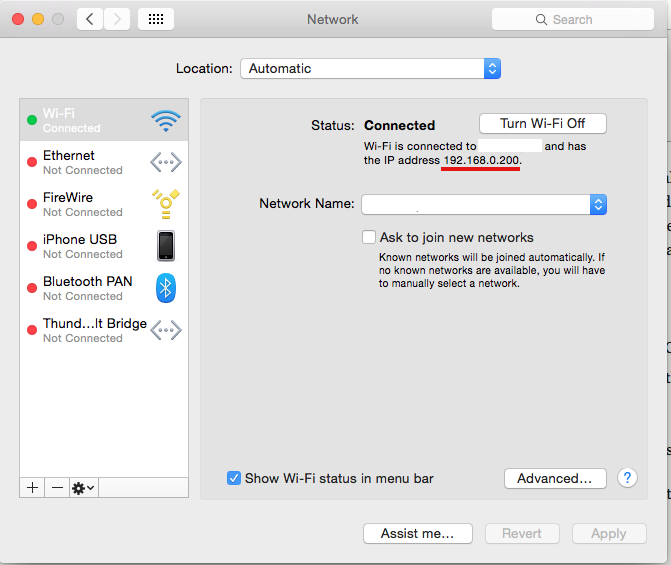
- Determine the IP address of the Mac by going to System Preferences -> Network
On the Windows PC:
- Install the Standalone Windows Study Retriever
- On the initial login page, enter the macOS workstation destination
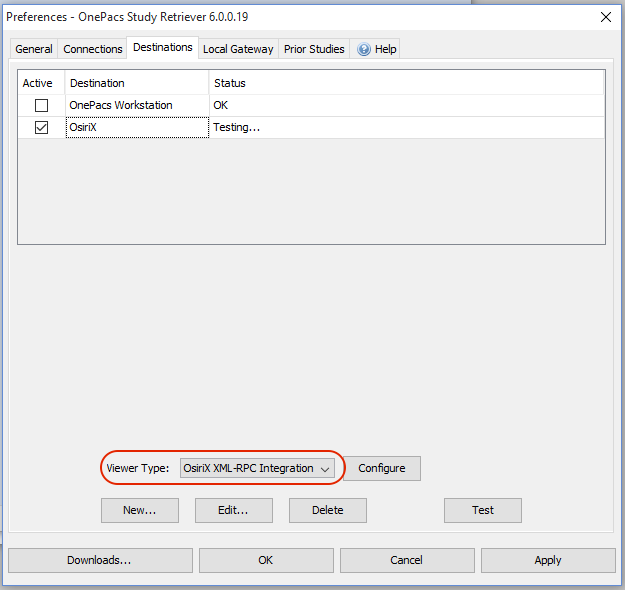
- Enable RPC integration in the study retriever.
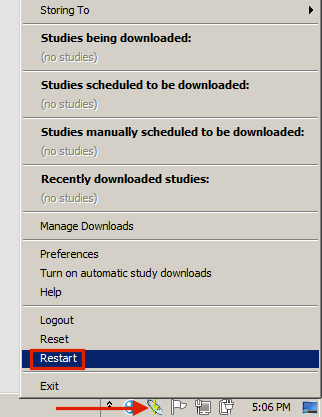
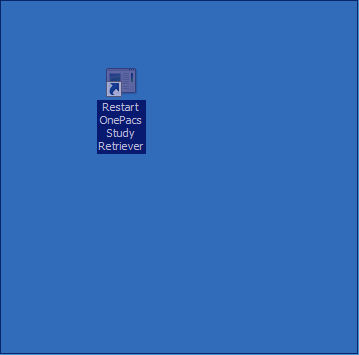
In the preferences of the study retriever, select Destinations -> Viewer Type -> RPC Integration: - Restart the study retriever by right-clicking on the icon in the Windows taskbar and choosing "Restart." You may also double-click on the "Restart study retriever" desktop link or reboot the PC.
OR
Changing the IP address of the Mac Computer
It may be necessary to change the IP address of the Mac computer in the Study Retriever if that address has changed (or there are multiple Macs).
- Determine the new IP address of the Mac (as described above)
- Right click on the study retriever icon in the taskbar and select "Preferences...". Click on the "Destinations" tab.
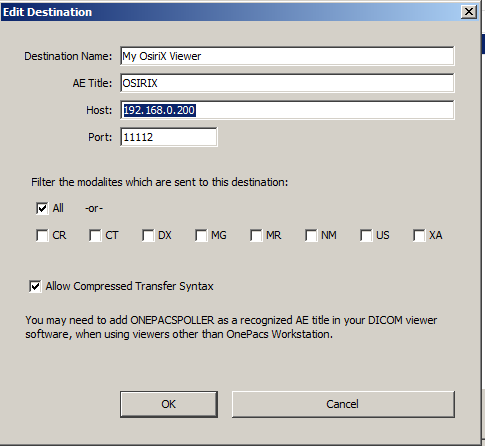
- Edit the OsiriX destination and enter the new IP address. Click "OK."
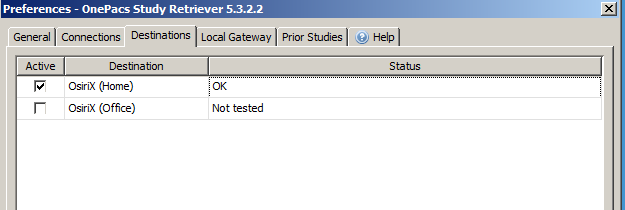
- If there are multiple Macs, at different locations, it may be more efficient to create two separate destinations and enable and disable as needed as shown below.
*OsirixTM, HorosTM, and AycanTM are trademarks of Pixmeo SARL, The Horos Project (Purview Inc)., and Aycan Medical Systems LLC. These companies and products are not affiliated with OnePacs. No endorsement of these companies or products by OnePacs, or endorsement of OnePacs by these companies, is implied.

