Scheduling
Schedules can be created to help manage certain aspects of the system. Schedules may be used, for example, to automatically activate an auto assignment rule or determine if a radiologist is available to be automatically assigned cases.
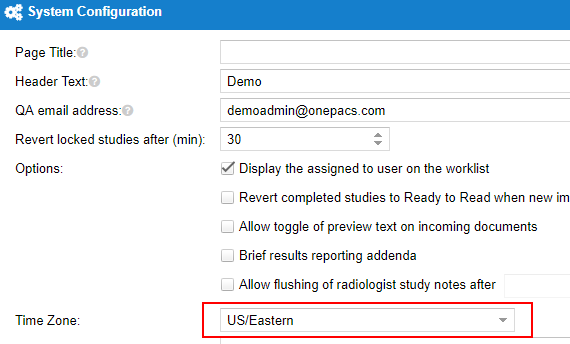
Set a timezone.
The first step in setting up a schedule is to configure the timezone in which that the radiology group does business. An administrator can use the Admin -> System configuration menu items and select a timezone. Click the "Save" button to save the new timezone. Schedules will be configured in this timezone.
Creating a schedule
Schedules can be created when adding or editing the system setting that is to be scheduled. If the setting can be set to a schedule it will show a "Schedule" field. Click on the "pencil" icon to create or edit the schedule. Below, the radiologist is on the "Nighthawk" schedule. Settings can be configured with a "Custom" schedule or can use a shared schedule. Even if a shared schedule is used, it can be customized later. After clicking on the pencil icon a new window will open to configure the schedule.
A new shared schedule can be created or edited by clicking on the "Manage Schedules" button
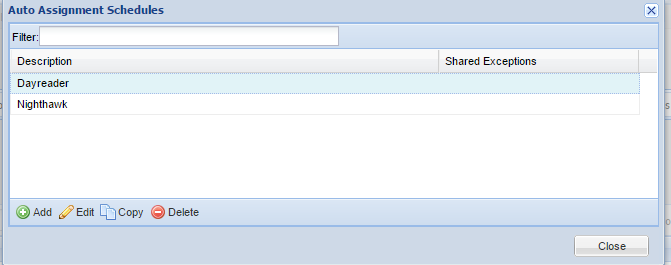
This will load a list of all of the schedules available for the setting that is being scheduled.
Use the "Add", "Edit", "Copy" and "Delete" buttons at the bottom of the list to manage the schedules. When adding or editing a schedule, provide a useful description to identify the schedule. To add a weekly schedule, add times under the appropriate days by selecting a start and end time and then clicking the "plus" icon. Weekly schedule times will be "active" and will repeat each week. Use the "Manage shared scheduled exceptions" to create a new list of exceptions for this schedule. This may be useful, for example, to exclude holidays. Select a shared calendar exception if necessary. Finally, this schedule may be configured to have exceptions past the shared exceptions. On the bottom, an exception to this schedule can be created by selecting a date, start time, end time, whether that time span is included or excluded, and optionally providing a note as to why the exception was made. Click the green "plus" icon to add the exception. This may be useful, for example, if all "Nighthawk" radiologists have a meeting on a certain date. These exceptions take priority over the "shared exceptions" (Holidays). Click the "Save" button to save the schedule.
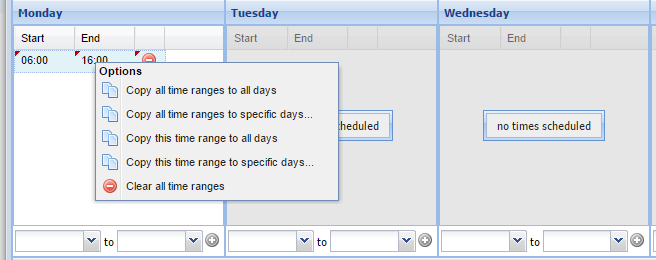
A user can right click on a time to quickly copy the selected or all time ranges to the other days.
Shared Exceptions may be used for common exceptions across a shared schedule. For example, to configure holidays.
Once a shared schedule is created, the setting can be configured to used that schedule. If it is not appropriate to use a shared schedule then a custom schedule can also be used. A setting can be switched from its custom schedule to a different shared schedule. Select "None" to remove the setting from the schedule. (Selecting "None" will remove any custom schedule.)
When a shared calendar is selected, that schedule will be loaded, but not editable. Further scheduling exceptions can still be made for this particular setting. For example, below the radiologist is on the "Nighthawk" weekly schedule, has off for two days, and most holidays, but there is also an override to schedule for the radiologist to work Christmas despite the shared exceptions having Christmas off.
Click the "Done" button when the schedule is complete. Next, click the "Save" button on the system setting that was schedule was configured for.


