MPR
Multi-Planar Reconstruction (MPR) is an alternate view layout whose purpose is to dynamically reformat a tomographic image stack from its original plane of acquisition into other planes. For this to be effective, the original stack should consist of relatively thin slices. In other word, if (x,y) describes a point in the plane of acquisition, then it should have a relatively high sampling frequency in the “z” dimension (ideally isotropic; i.e. same distance in z as in x and y). Also, the inter-slice distance should be constant, or nearly so, without large gaps between any of the slices. When these conditions are met, it's possible to achieve a high quality interpolated stack in any plane in real time.
Enabling MPR
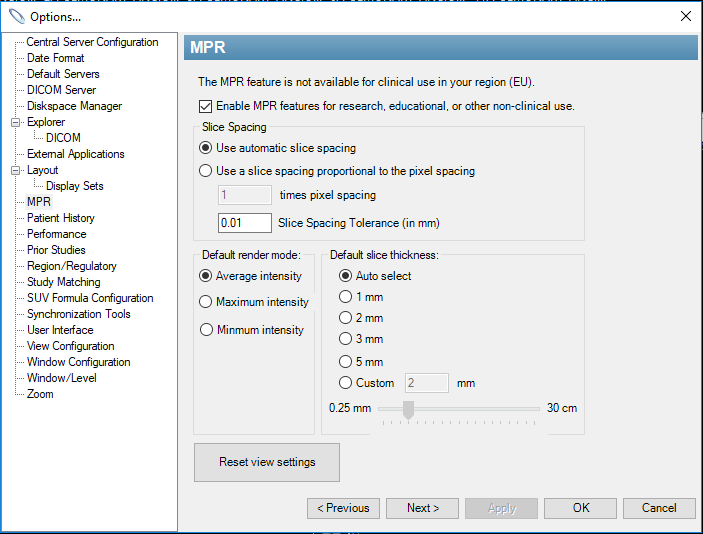
Note that this feature is not officially approved for patient care in all Regions, so it may not be enabled by default. If you wish to turn it on, select Tools–>Options from the menu bar. Then select the MPR options and click on the Enable MPR checkbox.
Also, notice that in this dialog, you can change:
- Slice Spacing Tolerance: This setting controls how much variability in the thickness between slices will be deemed acceptable. If the distance between any two slices varies by more than this amount, then MPR will not be allowed for that image stack.
- Default Render Mode: This setting allows specification of Average/Max/Min intensity projection.
- Default Slick Thickness: This setting defines the slice thickness used to generate the reformatted series.
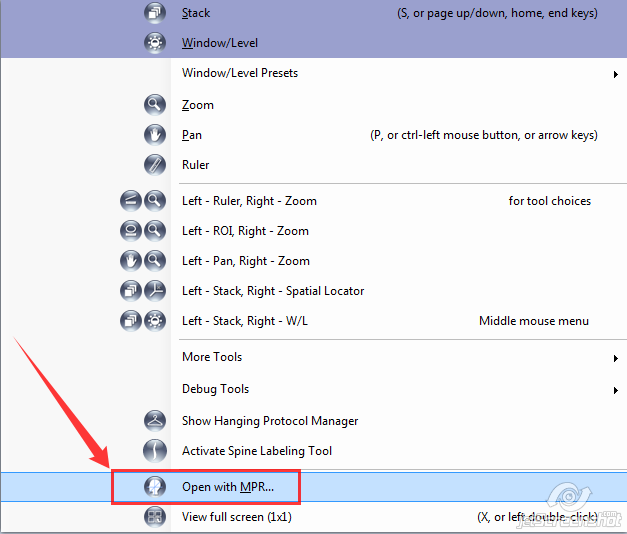
Once MPR has been enabled, you can show the series that's in the currently selected image box in MPR view by clicking the MPR icon in the toolbar: , by selecting Tools–>MPR–>Open Selection with MPR, or by selecting Open with MPR… from the right-click context menu.
Initializing the volume for reformatting can take a lot of system resources, so if the original series is large (like > 500 CT slices), then it could take some time to load the MPR view.
Using MPR
Once loaded, the MPR view presents as a 2×2 layout of image boxes. Each of the 4 image boxes can be manipulated in much the same way as before entering MPR mode; you can modify W/L, stack, zoom, pan, measure, annotate, etc. You can even use the Spine Label tool. So for example, you might have an axial thoracic spine CT, and by using MPR, you could get an instant, high quality reformat in the sagittal plane where the spine can be better appreciated.
The original series is displayed in the upper-left image box overlaid with three colored arrows representing the planes displayed in the other three image boxes. By default, two of the calculated planes are orthogonal to the original, and one is oblique. Moving up and down the stack in any of the four image boxes doesn't change which planes are calculated, but moving one of the three colored arrows does. For each arrow, you can move (by grabbing it with the left mouse and dragging) either endpoint, or the whole arrow. As you are dragging the arrow, you can see the linked plane updating in real time. Once you let go, then the referenced plane will stack along the new plane determined by the arrow's final position.
Exiting MPR
When entering MPR mode, a new tab is created for that view. To leave the MPR view, just close the MPR tab.


